How to issue an invoice in KSeF?
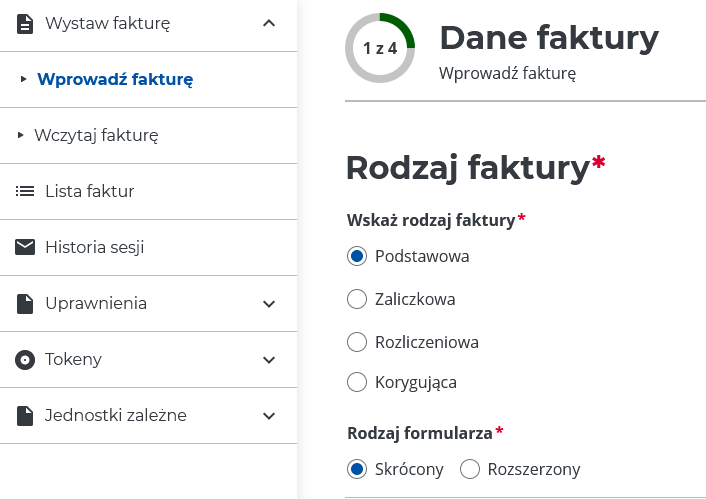
- After logging in to your company account, select from the side menu
Wystaw fakturę, and thenWprowadź fakturę. In the fieldRodzaj fakturywe choosePodstawowa, and in the fieldRodzaj formularza–Skrócony.
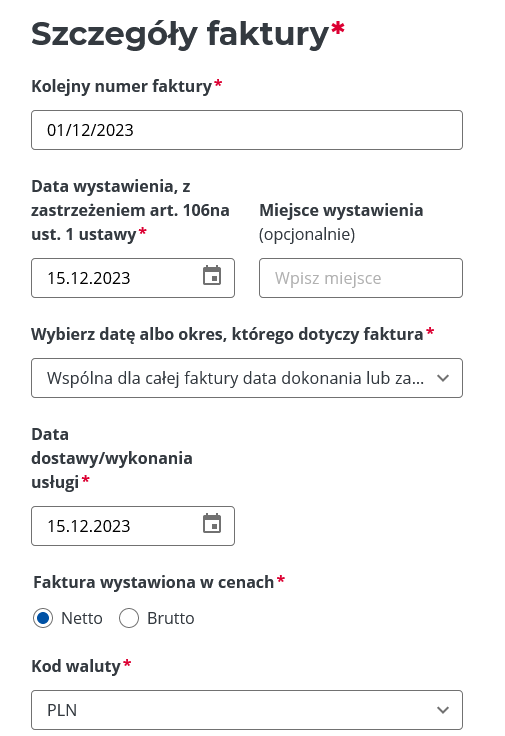
2. Next, we need to provide details describing the invoice. We fill in all mandatory fields in turn:
-
Kolejny numer faktury– 1/12/2023Data wystawienia– 15/12/2023Okres którego dotyczy faktura– Common for the entire invoice…Datę dostawy lub wykonania usługi– 15/12/2023Faktura wystawiona w cenach– NetKod waluty– PLN
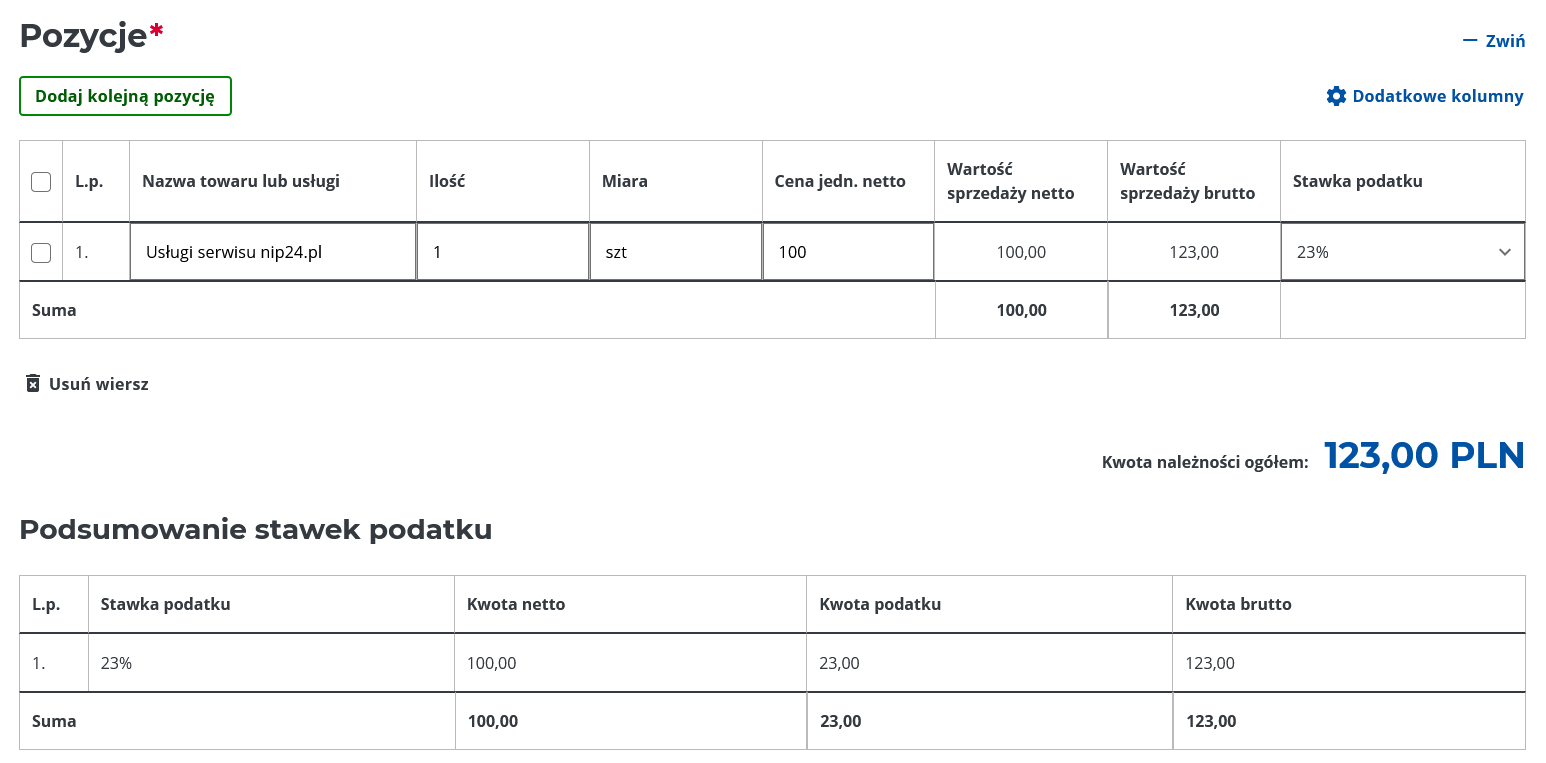
3. By sliding the screen down, we must add the items for which the invoice is issued. The application requires adding at least one invoice item, so we complete the following fields:
-
Nazwa towaru lub usługi– nip24.pl website servicesIlość– 1Miara– artCena jedn. Netto– 100Wartość sprzedaży netto– completed automaticallyWartość sprzedaży brutto– completed automaticallyStawka podatku– 23% (for most cases)
Pola w Podsumowanie stawek podatku are completed automatically.
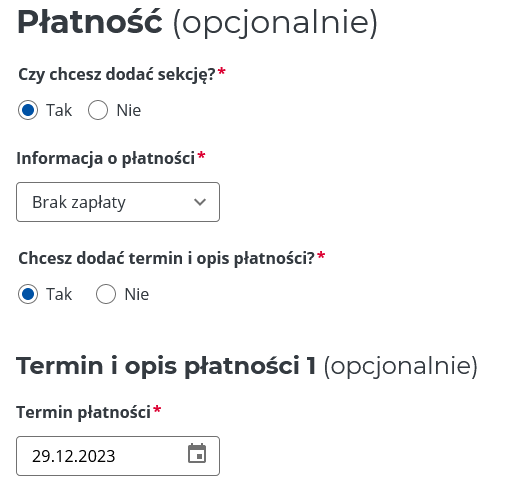
4. If we want our invoice to be paid by transfer, it is worth adding information about it Płatności. For this purpose we choose:
-
Czy chcesz dodać sekcję?- YesInformacja o płatności– No paymentChcesz dodać termin i opis płatności?- YesTermin płatności– we choose from the calendar, unfortunately it is not possible to select 7 or 14 days from the date of issue.
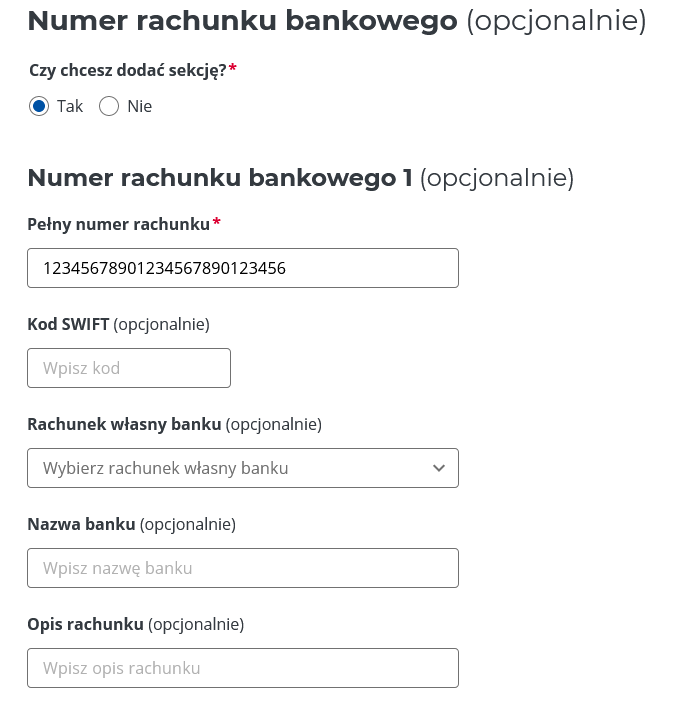
5. When asked whether to add a section about Numeru rachunku bankowego, of course we answer Yes and complete the following fields:
-
Pełny numer rachunku– enter our bank account number
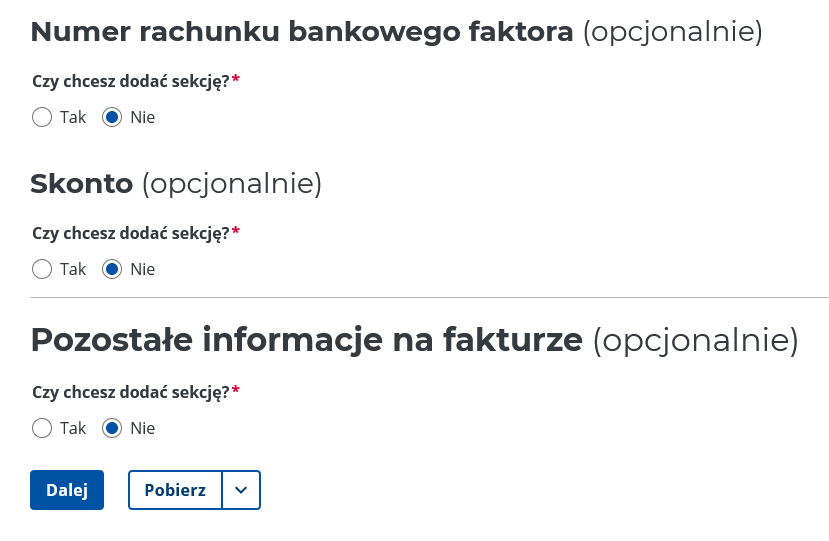
We can leave the remaining optional fields blank.
6. Leave the remaining optional sections blank in this step and press the button Dalejto go to the next step
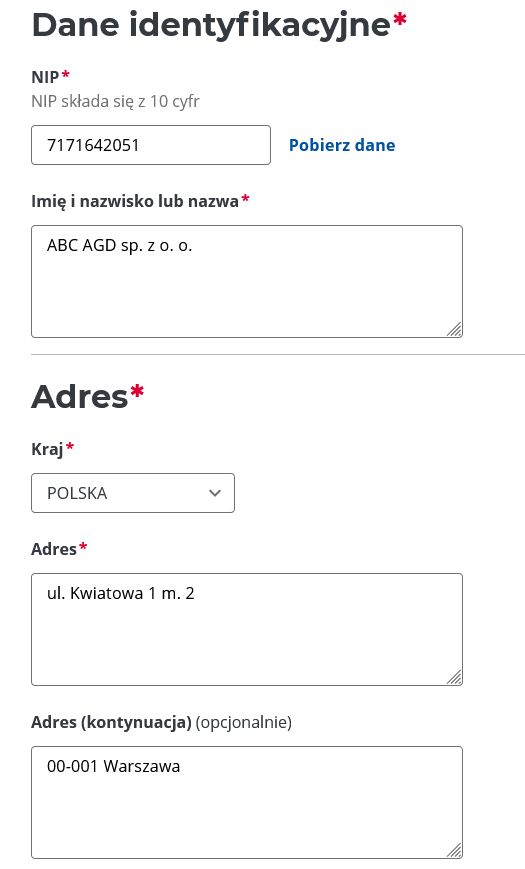
7. In the next step, we need to provide data Sprzedawcy, i.e. the details of our company that issues the invoice. Fortunately, the application developers allow you to download all the necessary data after entering the number NIP and pressing the button Pobierz dane.
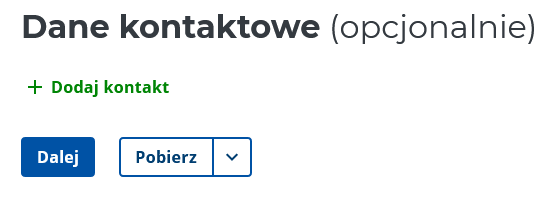
8. We don't want to provide contact details, so we press the button once Dalej to proceed to the next step of the KSeF invoice creator.
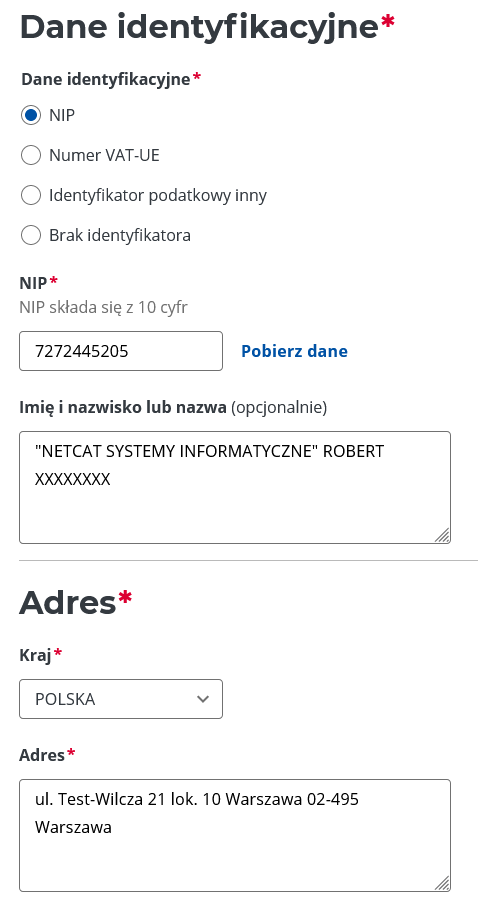
9. In step 3 of 4 we need to enter identification data Nabywcy. Here, application authors also enable downloading data and automatically filling out the form based on the entered number NIP. Therefore, let's use this option to quickly fill in the fields describing the Buyer, i.e. the entity for which we issue an invoice in KSeF.
10. Traditionally, a section Dane kontaktowe leave it blank and click Dalejto go to the last step of the wizard.

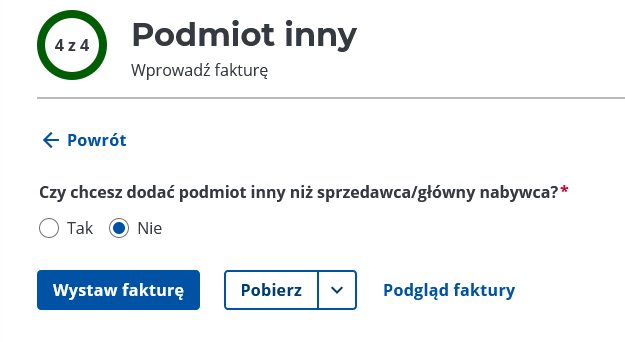
11. The last step (4/4) allows you to add an entity other than the Seller or the Buyer. Of course, in 95% cases this is not necessary, so before issuing the invoice we can preview it and if everything is correct, we press the button Wystaw fakturę.
12. After clicking the button Wystaw fakturę, the application sends the invoice to KSeF. Correct completion of the operation always returns the KSeF invoice number assigned by the system:
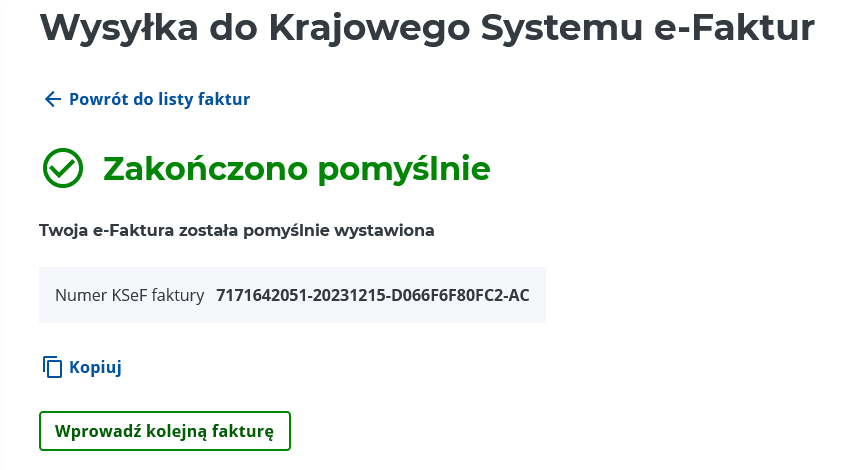
Way to go! You have just issued your first KSeF invoice.
other parts A guide to KSeF, which may also be interesting reading:
- Creating an account in the National e-Invoice System.
- I am issuing my first KSeF invoice.
- How can I load an invoice into KSeF if it was issued from another invoice generating program?
- I need to search and download a cost invoice from KSeF
- I want to generate an authorization token enabling sending and receiving KSeF invoices using libraries provided by nip24.pl and REST API